Online experiments with PsychoPy
This page covers the full workflow for creating and running online experiments on Pavlovia using the PsychoPy Builder: from installation and uploading, through setting up stimuli and informed consent, to common pitfalls and advanced features.
PsychoPy Builder documentation and workshop
Check the PsychoPy Builder website for a full explanation of the Builder GUI and all available components. Christophe Bossens also organizes a Workshop on PsychoPy Builder once a year.
Installing PsychoPy Builder
To design a PsychoPy task in the PsychoPy Builder the first step will be to install the (free) PsychoPy Desktop application. Installation instructions can be found here. After installation you will automatically have three PsychoPy applications/interfaces: the Builder, the Coder and the Runner. Here we will mostly work in the Builder, however you can test the experiment offline using e.g. the Runner interface.
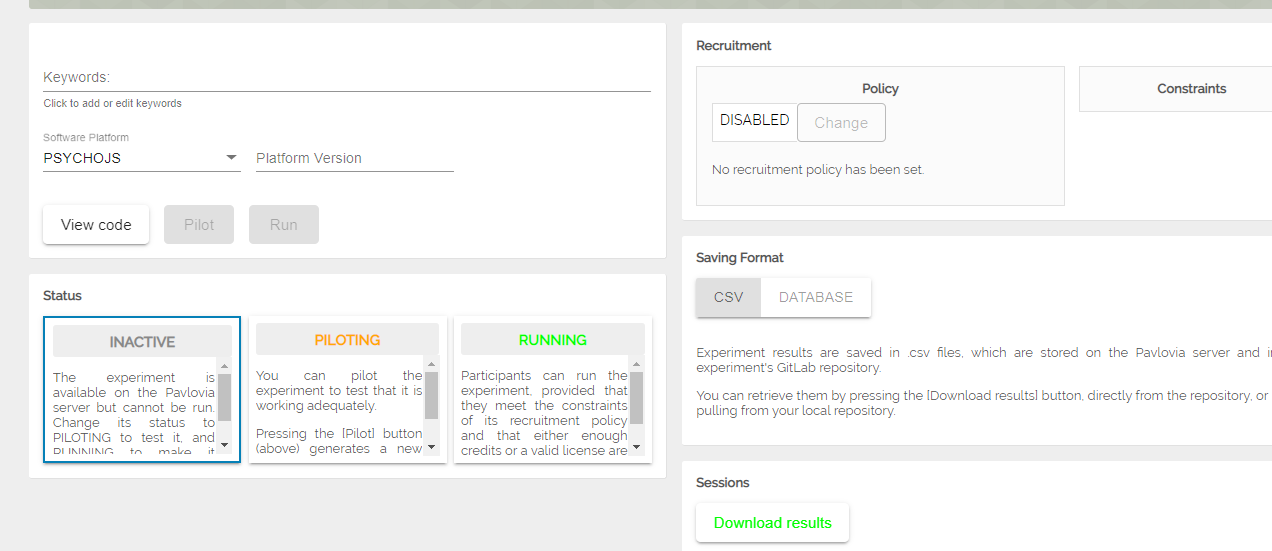
Uploading to Pavlovia
Follow the steps below to successfully upload your experiment to Pavlovia.
- Create the experiment in PsychoPy Builder.
- Create a Pavlovia account and log in.
- Link your account to the Builder via this button

- Place all files for the experiment in a single directory.
- Click the Syncing Globe
 in the Builder, enter a project name, and upload. The icon will turn green when the upload is complete.
 - Access your experiment on Pavlovia by navigating to Dashboard > Experiments in your account.
- To test the project, change the status to piloting and click pilot.
Tip
If the experiment doesn't run, click view code. If the repository is empty, retry the sync from the Builder.
Running experiments with lab credits
To run experiments beyond piloting, you may need credits. We have a Hoplab account for this purpose. Ask Klara or Silke how to get access to it.
More information can be found on the PsychoPy website on this page and this page.
Working with stimuli
Images
Make sure all image files are in the html > Resources directory. Missing files will cause a resource error on Pavlovia.
To ensure consistent display sizes across different screens, follow these image guidelines.
Movie stimuli
Pavlovia supports standard video formats, such as .mp4. If your videos are in a different format, convert them using free software like Handbrake.
- Set the video to play every repeat in the Builder. If videos need to repeat, Pavlovia will only display the last frame unless reset.
- To reset the video between trials, use a code snippet. For details, check the PsychoPy community guide and this link.
Video troubleshooting
If your videos don't display, try adjusting the Units setting to pix or another compatible format.
Text stimuli
- WrapWidth: If the text doesn't fit on the screen, increase the WrapWidth under the Advanced tab. WrapWidth defines the maximum width at which text wraps to a new line.
-
Centering text: To center text, add the following JavaScript code snippet in a JS-only code chunk:
This will center the text online; however, offline functionality may be impacted if the code isn't set to JS-only.
Rest trials and breaks
To introduce rest trials or breaks, add a code snippet under Each Frame. For specific approaches, refer to this guide and this page.
Informed consent
Online experiments require participants to give informed consent before starting. Since PsychoPy's Form component does not work on Pavlovia, you need an alternative approach. The two most common methods are:
Option 1: Button-based consent screen (recommended)
Build a consent routine in the Builder using text and shape components:
- Add a Text component displaying the consent information (study purpose, data handling, right to withdraw, etc.).
- Add two Polygon components styled as buttons (e.g., green "I agree" and red "I do not agree"), each with a Text label on top.
-
Add a Mouse component and a Code component to detect clicks:
-
After the consent routine, use a Code component to end the experiment if consent was not given:
Warning
Make sure to define consent_given = False in the Begin Experiment tab to avoid undefined variable errors on Pavlovia.
Option 2: Embedded HTML consent form
For more complex consent forms (e.g., with checkboxes for multiple clauses), you can embed an external HTML file using JavaScript. This approach loads a .html consent form in an iframe and captures the responses. Note that this only works online — it will not run locally.
For a working example, see this community thread on embedded HTML consent forms.
Further reading
- Best practices for consent forms in online experiments
- Consent form in PsychoPy Builder
- Adding consent to online tasks
Common pitfalls
Excel and CSV files
To ensure compatibility, follow these conventions:
- No empty columns or rows: Remove any extra spaces or blanks in your spreadsheet.
- Unique column names: Every column needs a unique name, and the top row should not have empty cells.
- Avoid special characters in the text fields.
- Save as CSV: Convert your Excel files to CSV format before using them in Pavlovia.
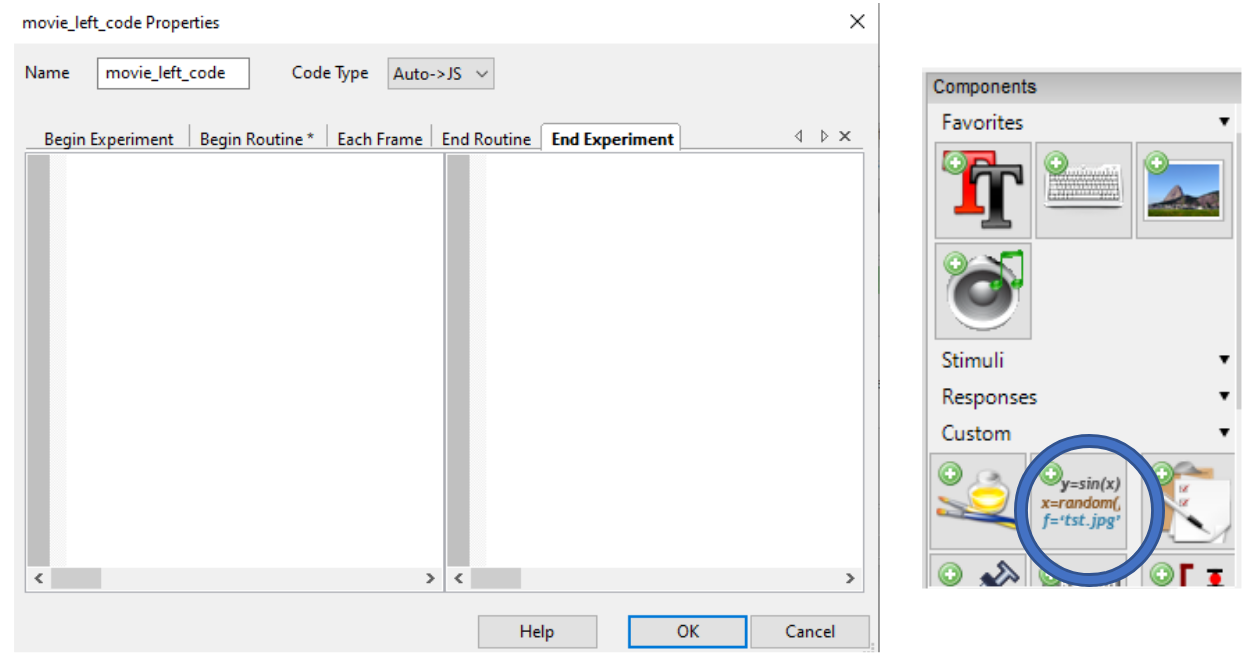
Writing custom code
Add custom code through the Components > Custom > Code tab in the Builder, and do not add code directly in Coder.
For phase-specific code snippets, add them to the appropriate section in the Code Component (e.g., Begin Experiment, Begin Routine, Each Frame).
Ensure that Python code is entered in the box on the left and JavaScript code (or both) in the box on the right. Use the Code Type option to specify the language.
Consult the PsychoPy Python-to-JavaScript crib sheet for additional guidance.
Python-to-JavaScript translation
Some Python code does not automatically translate to JavaScript. Generally, automatic translation to JS works well if you configure everything in the Builder's GUI. However, directly coding or modifying code snippets can sometimes lead to translation failures, particularly if you need to:
- Track variables over time, such as adapting later trials based on earlier ones.
- Introduce breaks after a specific number of trials.
For more on these issues, see this thread on Pavlovia troubleshooting.
You may need to edit translations manually by setting the top-right Code Type box to Both.
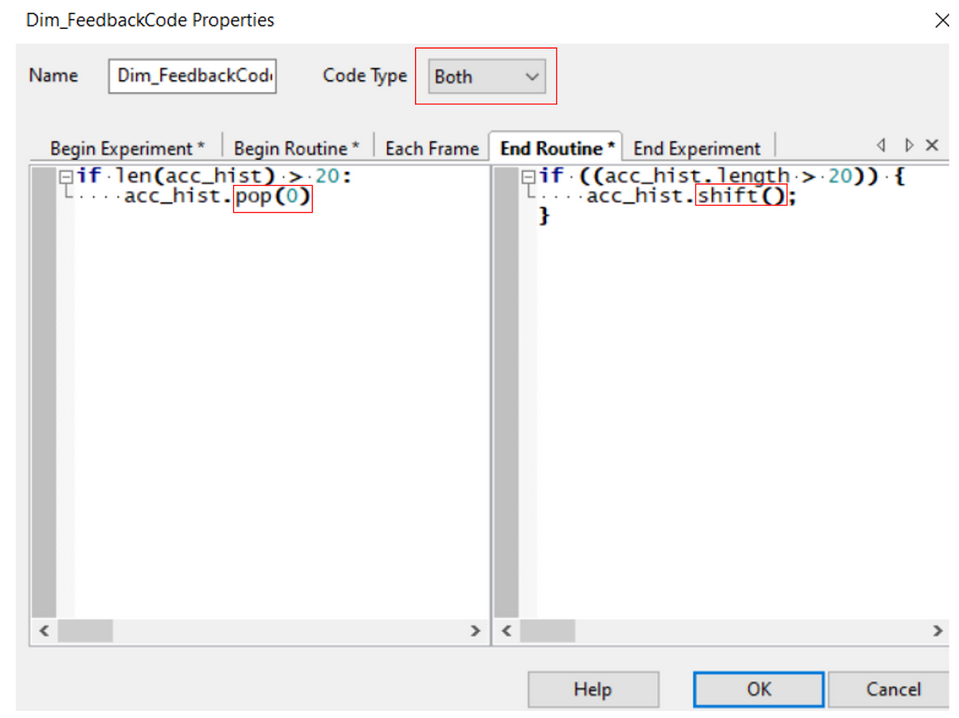
This setting allows you to modify both the left (Python) and right (JavaScript) code boxes independently, without affecting the other.
Tracking trials across languages
If you want to track a fixed number of trials, you can create a list and remove the oldest trial entry once the list length exceeds your desired count. For instance, to track responses for the last 20 trials, create a list of responses and use a different method in each language:
- Python:
.pop(0) - JavaScript:
.shift()
To stop a loop, JavaScript does not recognize specific loop names. For instance, if stopping a loop named preparation, this will translate as preparation.finished in JavaScript. Change this in the right box to trials.finished.
- Stopping Nested Loops:
trials.finishedonly stops the inner loop. To stop an outer loop (e.g.,PreparationBlock), you may need a different solution, as stopping nested loops is limited in Pavlovia.
Common JS definitions to add at experiment start
For Python commands that do not exist in JavaScript, define them at the beginning of the experiment in a JS-only code chunk to simplify translation. Note that some of these commands may still need manual translation per code chunk.
// The experiment identifier
thisExp=psychoJS.experiment;

// Psychopy window
win=psychoJS.window;

// Event manager of Psychopy
event=psychoJS.eventManager;

// Shuffle command
shuffle = util.shuffle;

// Sorting array elements and returning a sorted list
sort = function(array) {
    return array.sort();
};

// Appending elements to a list
Array.prototype.append = [].push;

// Getting the index of an element in a list
Array.prototype.index = [].indexOf;

// Summing elements in a list
sum = function(arr) {
    return arr.reduce((a, b) => a + b);
};

// Counting occurrences of a value in a list
Array.prototype.count = function(value) {
    let count = 0;
    this.forEach(item => {
        if (item === value) count++;
    });
    return count;
};
Advanced topics
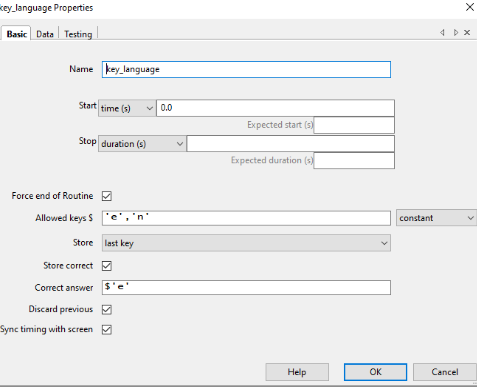
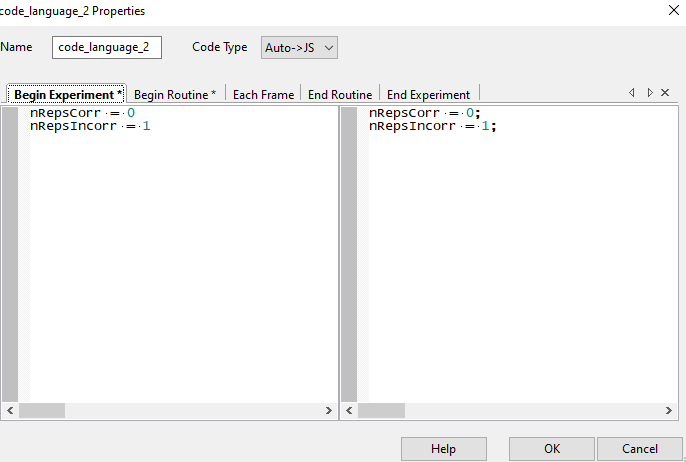
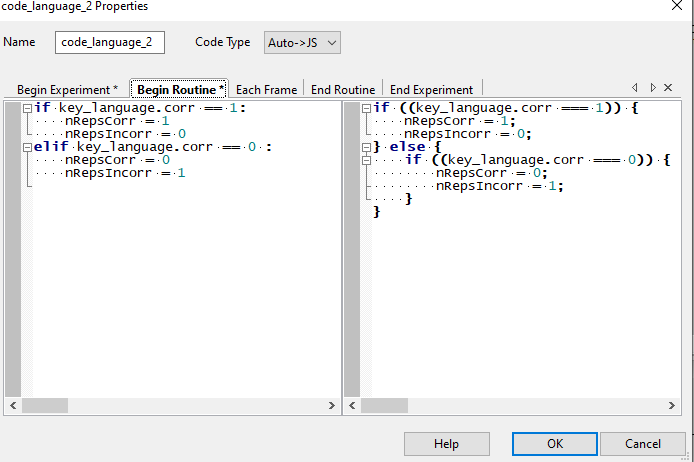
Language selection and conditional loops
- Place the code component in a separate routine from the key press defining the selection.
- To create conditional loops based on key press selection, refer to this guide.
Example for language selection (e.g., 'e' for English, 'n' for Dutch):
- Store the chosen key in a variable.
- Add a code component, set
nRepsto a variable based on the selection, and configure the loop accordingly.
Mobile device detection
To prevent participants from accessing the experiment on mobile devices, use this JS-only code snippet at the start of the experiment: